Hello freens. I purchased bossylobster.com from 1&1
recently with the intent of hosting it on Google App Engine. I soon
found out how delightful this process is. I made a 0.1 version for my
site at bossylobster.appspot.com and
decided to launch by clicking Add Domain in the Application Settings.
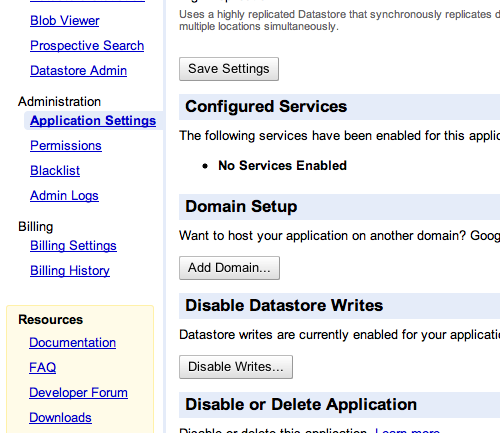
After clicking this I was greeted with a note:
You must sign up for Google Apps to register this domain or prove that you already own it.
Great, so now I had to sign up for Google Apps. (As a side note, at the time this seemed an unnecessary, annoying wrinkle to add my App, but I now realize the integration with GMail, Calendar, Docs, etc. is fantastic.)
So here is my ish: prove that you already own it.
Yesterday morning, I spent several hours trying to verify ownership of bossylobster.com (which I had purchased a week prior). While I realize the DNS propagation process takes some time, I didn't want to try one method, wait 24 hours and then realize at that point it hadn't worked.
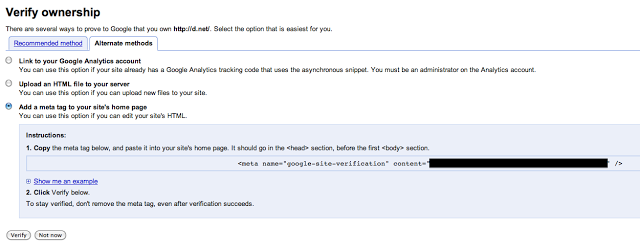
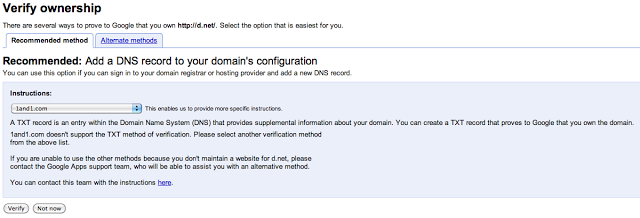
So, Google Apps gives four options on how to verify:
- Create a TXT record
- Upload an HTML file to a specific path on your site
- Add a
<meta>tag to your home page - Verify using your Google Analytics tracking code
Well, since I hadn't set my website up, the last three options were off limits to me (or so I thought). I had a bare minimum package from 1&1, so hosting was pretty much off limits. Apparently I picked one of the inept domain hosts because they don't support creation of a CNAME TXT record!! A quick Google search reveals
Yes, we do understand what an SPF record is. Unfortunately we do not support in on our hosting plans. We apologize for any inconvenience.
So here I am back to square one, just trying to prove I own something, an inherently basic task made incredibly frustrating. Hopefully I can help people avoid some frustration with the following instructions.
- Open terminal and change into the directory with code for bossylobster (your site).
-
Create a Django project in that directory via the command
[sudo] django-admin.py startproject bossylobster_django.(If you don't have Django or you are using Windows, read these install instructions, but DON'T SET UP A DATABASE, not necessary here. For a more detailed tutorial see this page. Also note,
startprojectis the function name in thedjango-adminmodule andbossylobster_djangocan be replaced with your project name. 1. Change the filebossylobster_django/urls.pyto:from django.conf.urls.defaults import patterns from django.conf.urls.defaults import url urlpatterns = patterns('', url(r'^$', 'bossylobster_django.views.index', name='home'), ) -
Change the file
bossylobster_django/views.pyto:from django.http import HttpResponse def index(request): content = '\n'.join([ '<html>', ' <head>', ' <meta name="google-site-verification" content="XXXX" />', ' </head>', ' <body>', ' Hello world!', ' </body>', ' </html>', ]) return HttpResponse(content)where
XXXXshould be replaced by the content value provided by Google. -
Determine your internal IP address for use in step 6
-
Determine your router's (external) IP address for use in step 7
-
Set up a port forwarding rule in your router for port 80 (websites) with the IP address you found in 4
-
(After logging in to 1&1) change IP for bossylobster.com to point to your router (from 5)
-
From the
bossylobster_djangodirectory (or whatever you called it), run the server via[sudo] python manage.py runserver 192.168.XX.YY:80where
192.168.XX.YYis the IP you found in 6b. -
Check to see if your change has propagated to DNS servers worldwide (wait until it has)
-
Upon propagation, login to Google Apps and verify via the meta tag